Splunk 对接 Windows 11 日志


On this page
先决检查
Win11 IP:10.10.10.103
Splunk IP:10.10.20.100
在 Win11(10.10.10.103)上以管理员打开 PowerShell(以管理员运行)。运行:
Test-NetConnection -ComputerName 10.10.20.100 -Port 9997

ComputerName     : 10.10.20.100
RemoteAddress    : 10.10.20.100
RemotePort       : 9997
InterfaceAlias   : Ethernet0
SourceAddress    : 10.10.10.103
TcpTestSucceeded : True
在 Windows 11 上安装 Sysmon
- 下载 Sysmon(来自 Sysinternals)
- 下载对应的 Sysmon config
例如 GitHub: https://github.com/SwiftOnSecurity/sysmon-config
- 安装命令(管理员 PowerShell):
# 在 C:\Tools\Sysmon 下放 sysmon64.exe 和 sysmonconfig-export.xml

PS C:\WINDOWS\system32> cd C:\Users\ooovi\Desktop\Sysmon
PS C:\Users\ooovi\Desktop\Sysmon> .\sysmon64.exe -accepteula -i sysmonconfig.xml

System Monitor v15.15 - System activity monitor
By Mark Russinovich and Thomas Garnier
Copyright (C) 2014-2024 Microsoft Corporation
Using libxml2. libxml2 is Copyright (C) 1998-2012 Daniel Veillard. All Rights Reserved.
Sysinternals - www.sysinternals.com
Loading configuration file with schema version 4.90
Configuration file validated.
Sysmon64 installed.
SysmonDrv installed.
Starting SysmonDrv.
SysmonDrv started.
Starting Sysmon64..
Sysmon64 started.
# 查看状态

wevtutil qe Microsoft-Windows-Sysmon/Operational /c:1

PS C:\Users\ooovi\Desktop\Sysmon> wevtutil qe Microsoft-Windows-Sysmon/Operational /c:1
<Event xmlns='http://schemas.microsoft.com/win/2004/08/events/event'><System><Provider Name='Microsoft-Windows-Sysmon' Guid='{5770385f-c22a-43e0-bf4c-06f5698ffbd9}'/><EventID>16</EventID><Version>3</Version><Level>4</Level><Task>16</Task><Opcode>0</Opcode><Keywords>0x8000000000000000</Keywords><TimeCreated SystemTime='2025-09-18T11:57:30.3993580Z'/><EventRecordID>1</EventRecordID><Correlation/><Execution ProcessID='7280' ThreadID='1236'/><Channel>Microsoft-Windows-Sysmon/Operational</Channel><Computer>DESKTOP-MFMRAM5</Computer><Security UserID='S-1-5-21-1482986778-2486709761-2059158241-1001'/></System><EventData><Data Name='UtcTime'>2025-09-18 11:57:30.397</Data><Data Name='Configuration'>C:\Users\ooovi\Desktop\Sysmon\sysmonconfig.xml</Data><Data Name='ConfigurationFileHash'>SHA256=4516404FA30EE87CEA558567820CDC78863CC4AB07889519E49EAC3CCA92E0D2</Data></EventData></Event>
安装 Splunk Universal Forwarder
1) 根据需要选择运行账户:
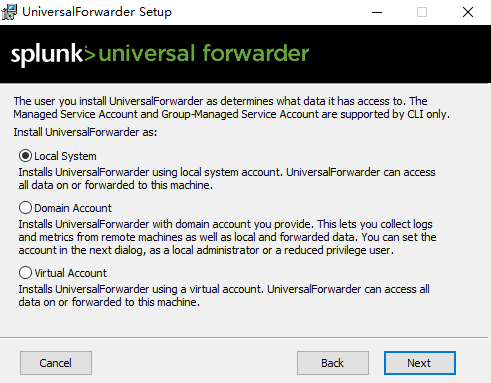
选项说明
Local System(本地系统账户)
权限:最高,本机几乎所有资源都能访问。
优点:能完整采集安全日志、Sysmon、注册表等敏感事件。
缺点:权限过高,不推荐在大规模生产环境(容易成为攻击面)。
Domain Account(域账户)
需要你手动输入域账号密码。
用于集中采集多台机器/远程资源时,必须域权限。
如果你只是单台 Win11 实验机,不需要。
Virtual Account(虚拟账户)
Windows 提供的一种轻量服务账号,权限略低于 Local System,但足够访问本机大多数事件日志(Sysmon、System、Application、Security 通常能抓)。
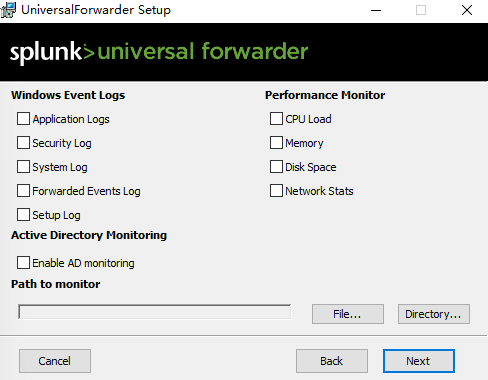
更安全,不容易被滥用。2)选择日志类型
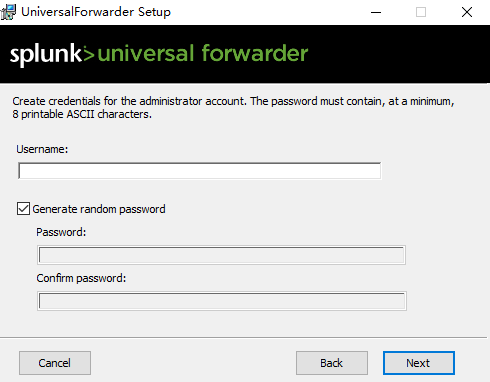
3)输入用户名&密码(如果忘记密码请看另一篇文章:Splunk Universal Forwarder 安装时的管理账号密码遗忘如何重置)
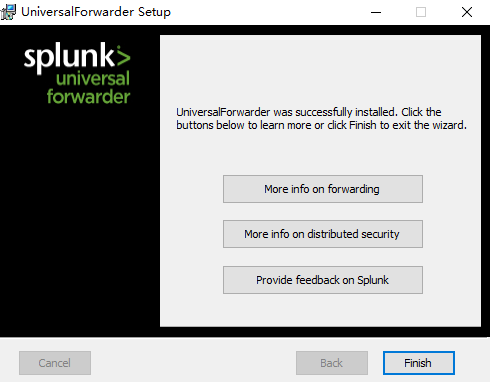
4)完成安装
在 UF 上用 inputs.conf / outputs.conf 做精细配置
1) inputs.conf(示例)
# ========================
# Sysmon 事件日志
# ========================
[WinEventLog://Microsoft-Windows-Sysmon/Operational]
disabled = 0
index = win_sysmon_lab
sourcetype = XmlWinEventLog:Microsoft-Windows-Sysmon/Operational

# ========================
# Windows Security 安全日志
# ========================
[WinEventLog://Security]
disabled = 0
index = win_sysmon_lab
sourcetype = WinEventLog:Security

# ========================
# Windows System 系统日志
# ========================
[WinEventLog://System]
disabled = 0
index = win_sysmon_lab
sourcetype = WinEventLog:System

# ========================
# Windows Application 应用日志
# ========================
[WinEventLog://Application]
disabled = 0
index = win_sysmon_lab
sourcetype = WinEventLog:Application

# ========================
# PowerShell Operational 日志
# ========================
[WinEventLog://Windows PowerShell/Operational]
disabled = 0
index = win_sysmon_lab
sourcetype = WinEventLog:PowerShell
保存后重启 UF 服务:在管理员 PowerShell:
# 重启 Splunk Universal Forwarder 服务

net stop SplunkForwarder
net start SplunkForwarder

# 或使用 sc query SplunkForwarder 查看状态

sc query SplunkForwarder
2) outputs.conf(示例,转发到 10.10.20.100:9997)
[tcpout]
defaultGroup = default-autolb-group

[tcpout:default-autolb-group]
server = 10.10.20.100:9997

[tcpout-server://10.10.20.100:9997]
# useACK = true    # 可在需要可靠传输时打开
默认启用了 SSL(Splunk 通信会自动加密);若你的 Indexer 使用自签证书且出现证书错误,可在 UF 上放置 Indexer 的 CA 到certs目录并在outputs.conf指定sslCertPath/sslRootCAPath。
在 Splunk Indexer / Search Head 配置(10.10.20.100)
- 在 Splunk 中创建索引
/opt/splunk/bin/splunk add index win_sysmon_lab -auth admin:pwd把 Sysmon 日志送进 Splunk
- 确认 Splunk Indexer 监听端口
在 Splunk 服务器(10.10.20.100)执行:
/opt/splunk/bin/splunk enable listen 9997 -auth admin:pwd

ss -lntp | grep 9997
确认有 LISTEN 0.0.0.0:9997。
- 配置 Universal Forwarder
在 Win11 上编辑inputs.conf(路径:C:\Program Files\SplunkUniversalForwarder\etc\system\local\inputs.conf),加入:
[WinEventLog://Microsoft-Windows-Sysmon/Operational]
disabled = 0
index = win_sysmon_lab
sourcetype = XmlWinEventLog:Microsoft-Windows-Sysmon/Operational
保存后重启 Forwarder:
net stop SplunkForwarder
net start SplunkForwarder
在 Win11(Forwarder)上验证“是否指向了 10.10.20.100:9997”
PS C:\Users\ooovi\Desktop\Sysmon> & "C:\Program Files\SplunkUniversalForwarder\bin\splunk.exe" list forward-server -auth admin:Pwd

Active forwards:
        10.10.20.100:9997
Configured but inactive forwards:
        None
若未 Connected,立刻看 UF 日志最后 100 行定位原因:
Get-Content "C:\Program Files\SplunkUniversalForwarder\var\log\splunk\splunkd.log" -Tail 100
- 在 Splunk 上安装 TA(推荐)
Splunk Add-on for Windows
Splunk Add-on for Sysmon
(能帮你把字段自动抽取出来,方便搜索)
- 在 Splunk 搜索验证
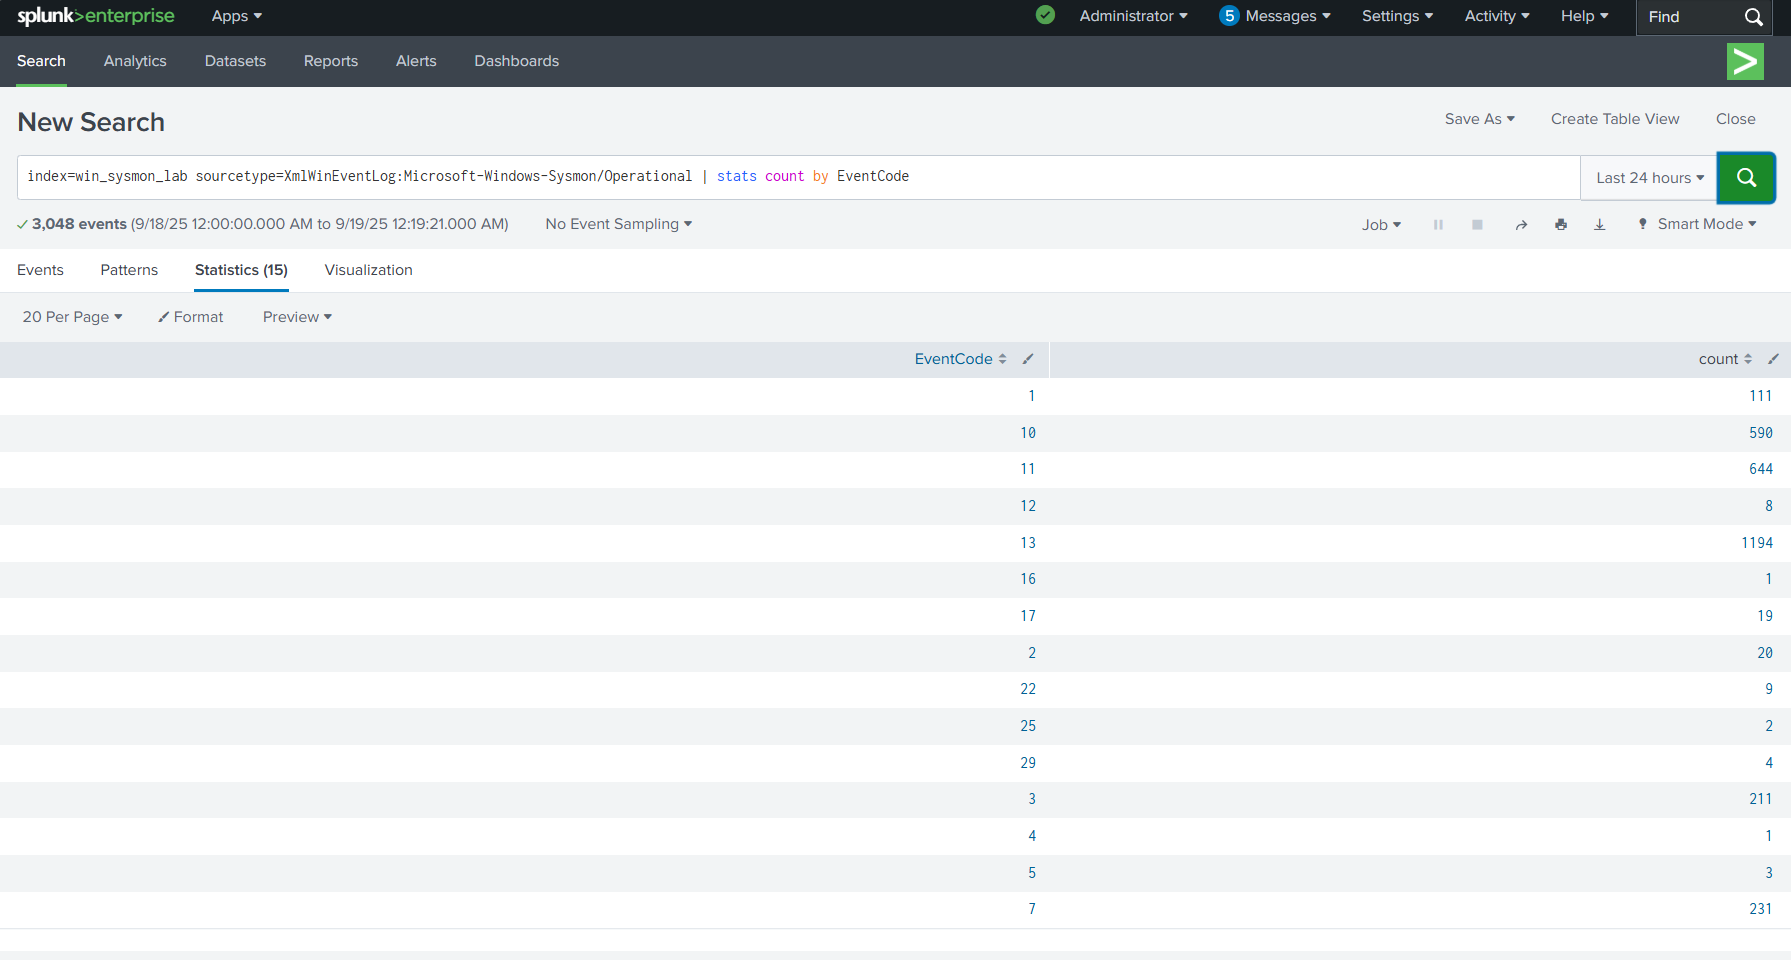
index=win_sysmon_lab sourcetype=XmlWinEventLog:Microsoft-Windows-Sysmon/Operational | stats count by EventCode你应该能看到 EventCode = 1(进程创建)、3(网络连接)、11(文件创建)等。
Discussion